Introduction
The table saw isn’t just for ripping and crosscutting—it’s one of the most powerful joinery tools in a woodworking shop. With the right techniques and setups, you can cut perfectly fitting tenons, miters, half-laps, and even finger joints, all with precision that rivals specialty machines.
In this guide, we’ll cover:
- How to prepare your saw for joinery work
- Step-by-step methods for the most common precision joints
- Pro tips to achieve a perfect fit every time
- Safety practices when working with joinery cuts
These techniques are essential for building furniture, cabinets, frames, and structural woodworking projects.
Preparing Your Table Saw for Joinery
Before making joinery cuts, ensure:
- Blade is sharp and true – A dull blade will tear fibers and cause loose joints.
- Fence and miter gauge are square – Accuracy starts with alignment.
- Zero-clearance insert – Reduces tear-out on delicate cuts.
- Dado blade set ready (for half-laps, dadoes, and tenons).
- Featherboards & clamps – Keep stock steady during multiple passes.
Cutting Tenons on a Table Saw
Tenons are the male part of a mortise-and-tenon joint, used for strong right-angle connections.
Method 1 – Using a Dado Blade Set
- Install dado stack to match tenon thickness.
- Set blade height to match shoulder depth.
- Use a miter gauge with a backing board.
- Make the cheek cuts by sliding workpiece across blade.
- Flip and repeat for the opposite cheek.
- Trim shoulders with standard blade for clean fit.
Pro Tip: Always cut the tenon slightly oversized, then fine-tune with light passes until the fit is snug but not forced.
Cutting Miters on a Table Saw
Miters are angled cuts (commonly 45°) used for frames, boxes, and decorative trim.
Steps:
- Set miter gauge to desired angle (e.g., 45°).
- Use a sharp crosscut blade for clean edges.
- Cut opposing pieces back-to-back to ensure perfect fit.
- Test fit and adjust angle if there’s a gap.
Pro Tip: Use a miter sled for more stability than a single miter gauge pass—especially for longer pieces.
Half-Lap Joints
Half-laps are strong, simple joints where two boards overlap by half their thickness.
Steps:
- Install dado blade to match lap width.
- Set blade height to half the thickness of the material.
- Use miter gauge for cross-laps, rip fence for long laps.
- Make multiple passes to clear out waste.
Pro Tip: Half-laps work best when the cut depth is exact—use calipers to measure thickness before setting blade height.
Finger (Box) Joints
Finger joints are interlocking rectangular “fingers” used for boxes and drawers.
Steps:
- Use a box joint jig on the miter gauge or sled.
- Match dado blade width to finger width.
- Cut first finger, then index jig to cut remaining fingers.
- Test fit and sand lightly for smooth assembly.
Pro Tip: Label mating pieces before cutting so the pattern matches perfectly.
Accuracy Hacks for Perfect Joints
- Test Cuts on Scrap: Always test on offcuts of the same thickness before cutting project pieces.
- Consistent Pressure: Feed material at the same rate for all mating pieces.
- Calibrate Often: Re-check miter angles and fence alignment after each project.
- Zero-Play Miter Slots: Use washers or miter slot shims to remove side-to-side play in the gauge.
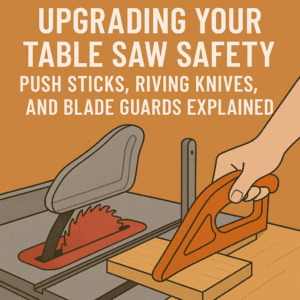
Safety Tips for Joinery Work on a Table Saw
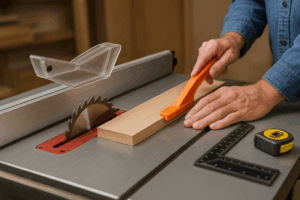
- Use push sticks for narrow pieces.
- Keep hands out of blade path—never reach over.
- Avoid loose sleeves or jewelry.
- Stand slightly to the side to avoid kickback.
- Never remove riving knife unless the cut requires it—and reinstall immediately after.
Conclusion
With these joinery techniques—tenons, miters, half-laps, and finger joints—your table saw becomes a joinery powerhouse. By combining the right blades, jigs, and precision setup, you can create professional-grade woodworking joints that are strong, accurate, and beautiful.
Anns is a contributor at TableSawGuide. We are committed to providing well-researched, accurate, and valuable content to our readers.
You May Also Like
About the Author
Related Articles
Leave a Comment
Share your thoughts, ask questions, or contribute to the woodworking community!