Introduction
A table saw is one of the most important tools in any woodworking shop. But like any precision machine, it needs regular maintenance to:
- Maintain cutting accuracy
- Extend the lifespan of components
- Ensure safe operation
Neglecting maintenance can lead to poor cut quality, motor strain, and even dangerous kickback.
In this guide, you’ll learn how to clean, align, lubricate, and care for your table saw so it performs like new for years.
Maintenance Schedule at a Glance
| Task | Frequency |
|---|---|
| Surface cleaning | After every use |
| Blade cleaning | Monthly (or when cutting slows) |
| Blade sharpening/replacement | As needed |
| Alignment check | Every 2–3 months |
| Lubrication | Twice a year |
| Deep cleaning & inspection | Annually |
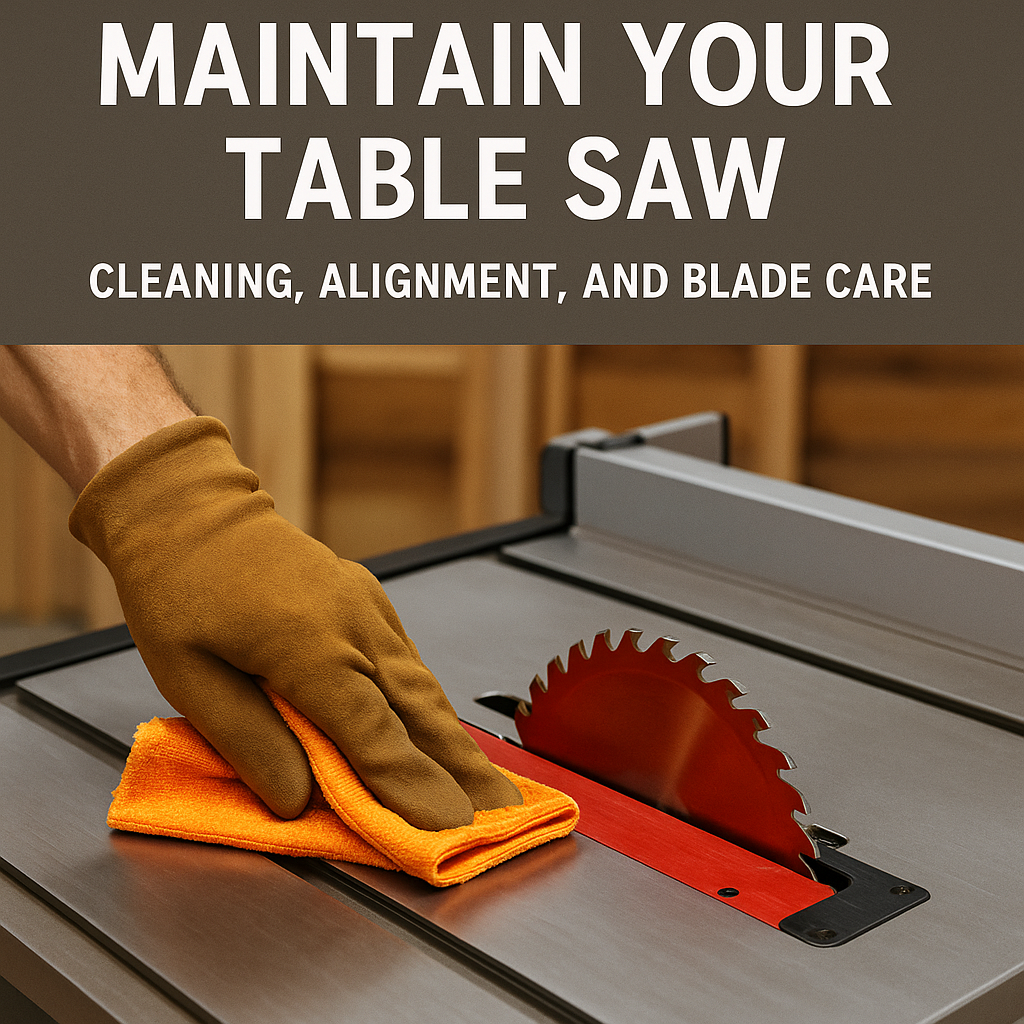
1. Cleaning Your Table Saw
Daily/After-Use Cleaning
- Remove dust and debris from the tabletop, miter slots, and fence using a brush or shop vacuum.
- Clear sawdust buildup under the blade and in the motor housing.
Why it matters: Sawdust buildup can affect cut quality and increase fire risk.
Monthly Deep Cleaning
Tools Needed:
- Shop vacuum
- Soft brush
- Mineral spirits (for resin removal)
- Clean rags
Steps:
- Unplug the saw for safety.
- Remove the throat plate and blade.
- Vacuum all visible dust.
- Wipe the tabletop with mineral spirits to remove pitch and resin.
- Dry thoroughly and apply paste wax to prevent rust.
Pro Tip: Avoid silicone-based sprays — they can cause finish problems on wood.
2. Blade Care and Maintenance
Cleaning Your Blade
- Resin buildup on blade teeth increases friction, causing burn marks and rough cuts.
- Soak blade in blade cleaner or warm soapy water for 10–15 minutes.
- Scrub gently with a nylon brush.
- Dry thoroughly to prevent rust.
Sharpening or Replacing
- Signs you need sharpening:
- Increased feed resistance
- Burn marks on wood
- Tear-out on cuts
- Carbide-tipped blades can be sharpened 5–10 times before replacement.
- If teeth are chipped or missing, replace the blade.
3. Checking and Adjusting Alignment
Proper alignment ensures accurate cuts and reduces binding/kickback.
What to Check:
- Blade to miter slot alignment
- Fence to miter slot alignment
- Blade tilt accuracy
Blade to Miter Slot Alignment
- Raise blade to max height.
- Use a combination square or dial indicator.
- Measure distance from miter slot to front tooth.
- Rotate blade and measure rear tooth.
- Adjust trunnion if measurements differ.
Fence Alignment
- Lock fence in place.
- Measure from fence to miter slot at front and back.
- Adjust until perfectly parallel.
4. Lubricating Moving Parts
Lubrication keeps adjustments smooth and prevents corrosion.
Lubricate:
- Gears for raising/lowering blade
- Trunnions (blade tilt mechanism)
- Fence locking mechanisms
Best Lubricants:
- Dry Teflon spray (won’t attract dust)
- Paste wax for tabletop
5. Inspecting Belts, Cords, and Safety Features
- Drive belts: Check for cracks or fraying.
- Power cord: Look for damage or exposed wires.
- Blade guard & riving knife: Ensure proper operation.
- Anti-kickback pawls: Clean and check spring tension.
6. Dust Collection Maintenance
If your saw has dust collection:
- Empty the dust bag or bin regularly.
- Check hoses for clogs.
- Clean the filter for better suction.
7. Annual Deep Maintenance
Once a year, do a full teardown:
- Remove motor housing covers.
- Clean all internal components.
- Check arbor bearings for wear.
- Inspect all bolts and screws for tightness.
Safety Tips During Maintenance
- Always unplug before any maintenance work.
- Wear gloves when handling sharp blades.
- Avoid over-tightening adjustments — precision is key.
Conclusion
A well-maintained table saw is safer, more accurate, and more enjoyable to use.
By following a regular cleaning, alignment, and lubrication schedule, you’ll protect your investment and keep your saw running smoothly for years.
Anns is a contributor at TableSawGuide. We are committed to providing well-researched, accurate, and valuable content to our readers.
You May Also Like
About the Author
Related Articles
Leave a Comment
Share your thoughts, ask questions, or contribute to the woodworking community!