Introduction
If you’re new to woodworking, the table saw will likely become the most important tool in your workshop. It’s powerful, versatile, and capable of making precise cuts—but only if you know how to use it properly. For beginners, learning table saw basics and safety practices is the first step to confident, injury-free woodworking.
In this guide, we’ll cover the parts of a table saw, basic operations, setup tips, and essential safety guidelines that every beginner should know before making their first cut.
What Is a Table Saw?
A table saw is a stationary woodworking tool with a circular saw blade mounted on an arbor, driven by an electric motor. The blade protrudes through the surface of the table, allowing wood to be pushed through for straight, accurate cuts.
Primary uses:
- Ripping – Cutting wood lengthwise along the grain
- Crosscutting – Cutting wood across the grain
- Angled cuts & bevels – Tilting or adjusting the blade for specific angles
- Grooves & dadoes – Making slots for joinery
Parts of a Table Saw
Understanding each component is key to safe and efficient use.
1. Blade – The heart of the saw; choose based on the type of cut/material.
2. Rip Fence – Guides wood during ripping for straight, precise cuts.
3. Miter Gauge – Helps make accurate crosscuts and angled cuts.
4. Tabletop – Flat surface supporting your material during cuts.
5. Throat Plate/Insert – Removable plate around the blade for maintenance and blade changes.
6. Blade Height & Angle Adjustment – Controls for raising, lowering, or tilting the blade.
7. Power Switch – Usually large and easily accessible for quick shut-off.
8. Riving Knife/Splitter – Prevents wood from pinching the blade and causing kickback.
9. Blade Guard – Covers the blade to reduce injury risk.
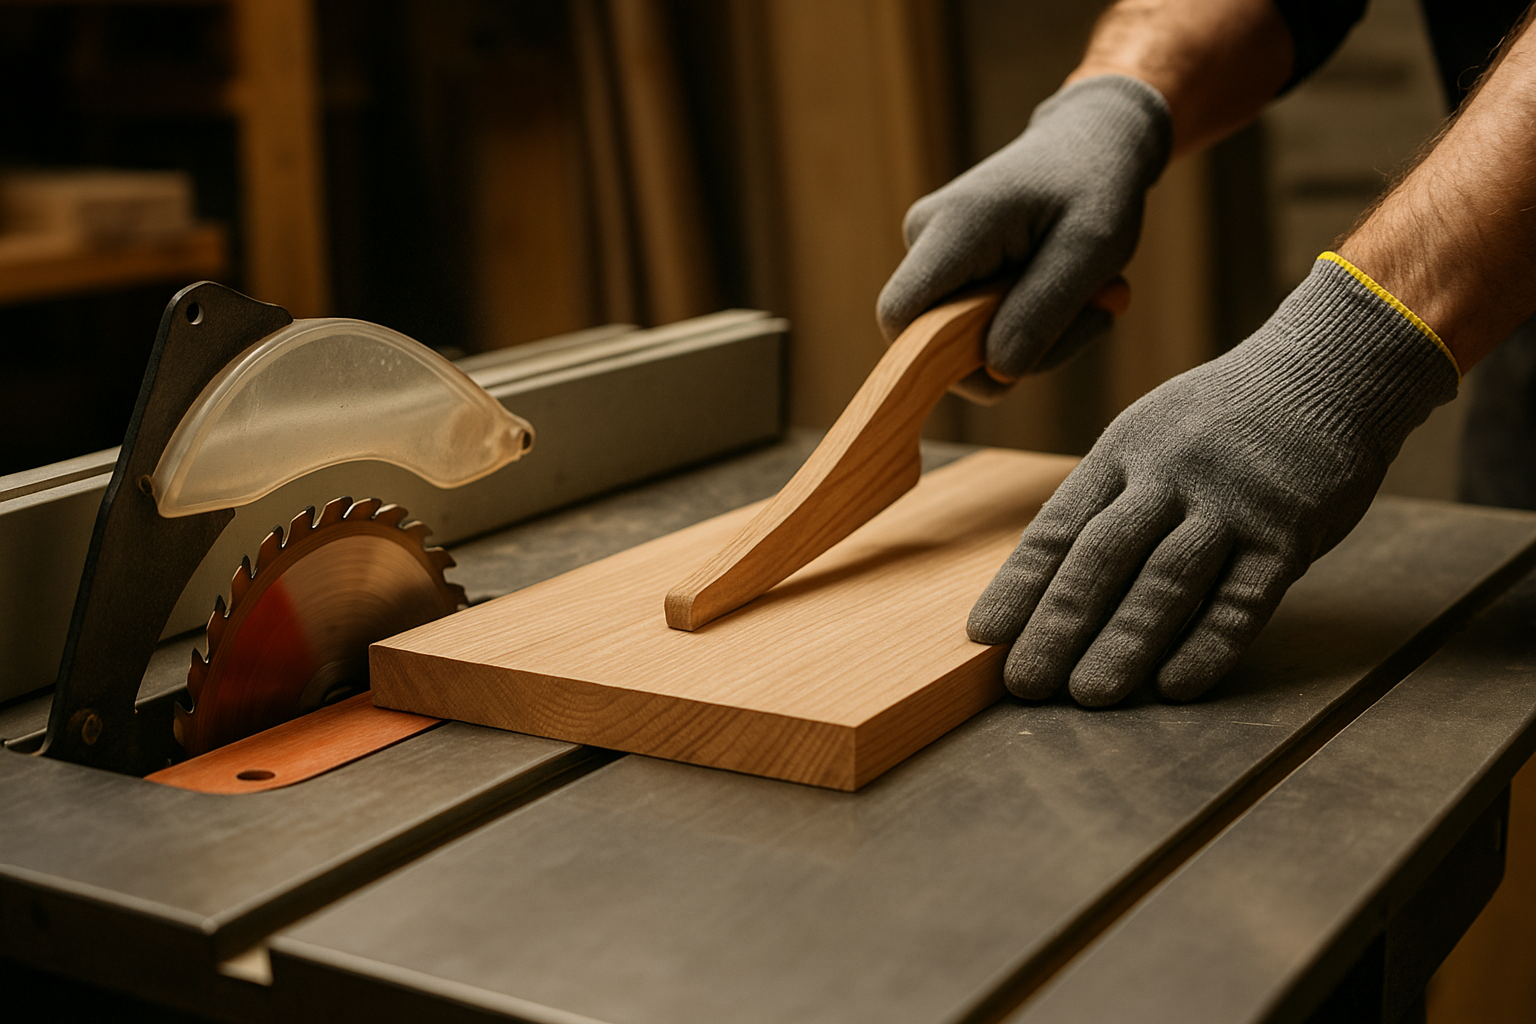
10. Push Stick – Keeps your hands safe when cutting narrow pieces.
Setting Up Your Table Saw
Before your first cut, proper setup ensures accuracy and safety.
1. Place on a stable, level surface – Wobbling can cause inaccuracies and hazards.
2. Check blade alignment – Use a square to ensure the blade is parallel to the miter slots.
3. Adjust the rip fence – It should also be parallel to the blade to avoid pinching and kickback.
4. Set blade height – About 1/8″ to 1/4″ above the thickness of your material.
5. Inspect safety features – Ensure the riving knife, blade guard, and anti-kickback pawls are in place.
Basic Table Saw Operations
1. Ripping
- Setup: Use the rip fence as your guide.
- Execution: Feed the wood steadily, keeping it flush against the fence.
- Safety tip: Use a push stick for narrow rips.
2. Crosscutting
- Setup: Use the miter gauge, not the rip fence.
- Execution: Keep the board firmly against the gauge as you push it through the blade.
3. Bevel Cuts
- Setup: Tilt the blade to the desired angle.
- Execution: Keep material flat and secure while feeding through.
4. Dadoes & Grooves
- Setup: Install a dado blade set.
- Execution: Make multiple passes or use the stack to achieve desired width.
Essential Table Saw Safety Tips
Operating a table saw without proper safety awareness can be dangerous. Follow these guidelines every time.
1. Wear safety gear – Safety glasses and hearing protection are essential.
2. Keep hands safe – Use push sticks, featherboards, and never position your hands in line with the blade.
3. Stand correctly – Slightly to the side of the blade path to avoid kickback.
4. Never cut freehand – Always use the rip fence or miter gauge.
5. Avoid distractions – Stay focused until the cut is complete and the blade has stopped.
6. Disconnect power before adjustments – Always unplug before changing blades or maintenance.
7. Maintain a clean work area – Clutter can cause tripping or poor control.
Common Beginner Mistakes (and How to Avoid Them)
- Cutting with a dull blade – Replace or sharpen regularly for cleaner cuts.
- Improper blade height – Too high increases risk; too low can cause binding.
- Forgetting to check alignment – Misaligned fences or blades can lead to poor cuts and kickback.
- Feeding too fast or too slow – Maintain steady pressure for smooth results.
Table Saw Maintenance Basics
Keeping your saw in top condition extends its life and improves cut quality:
- Clean dust from the table and blade after each use.
- Lubricate moving parts periodically.
- Check alignment monthly or after moving the saw.
- Replace worn or damaged blades promptly.
Conclusion
The table saw is one of the most powerful tools in woodworking—but it’s also one of the most dangerous if used incorrectly. By understanding its parts, mastering basic operations, and following strict safety practices, beginners can unlock the full potential of this tool while staying safe.
About the Author
Related Articles

Leave a Comment
Share your thoughts, ask questions, or contribute to the woodworking community!